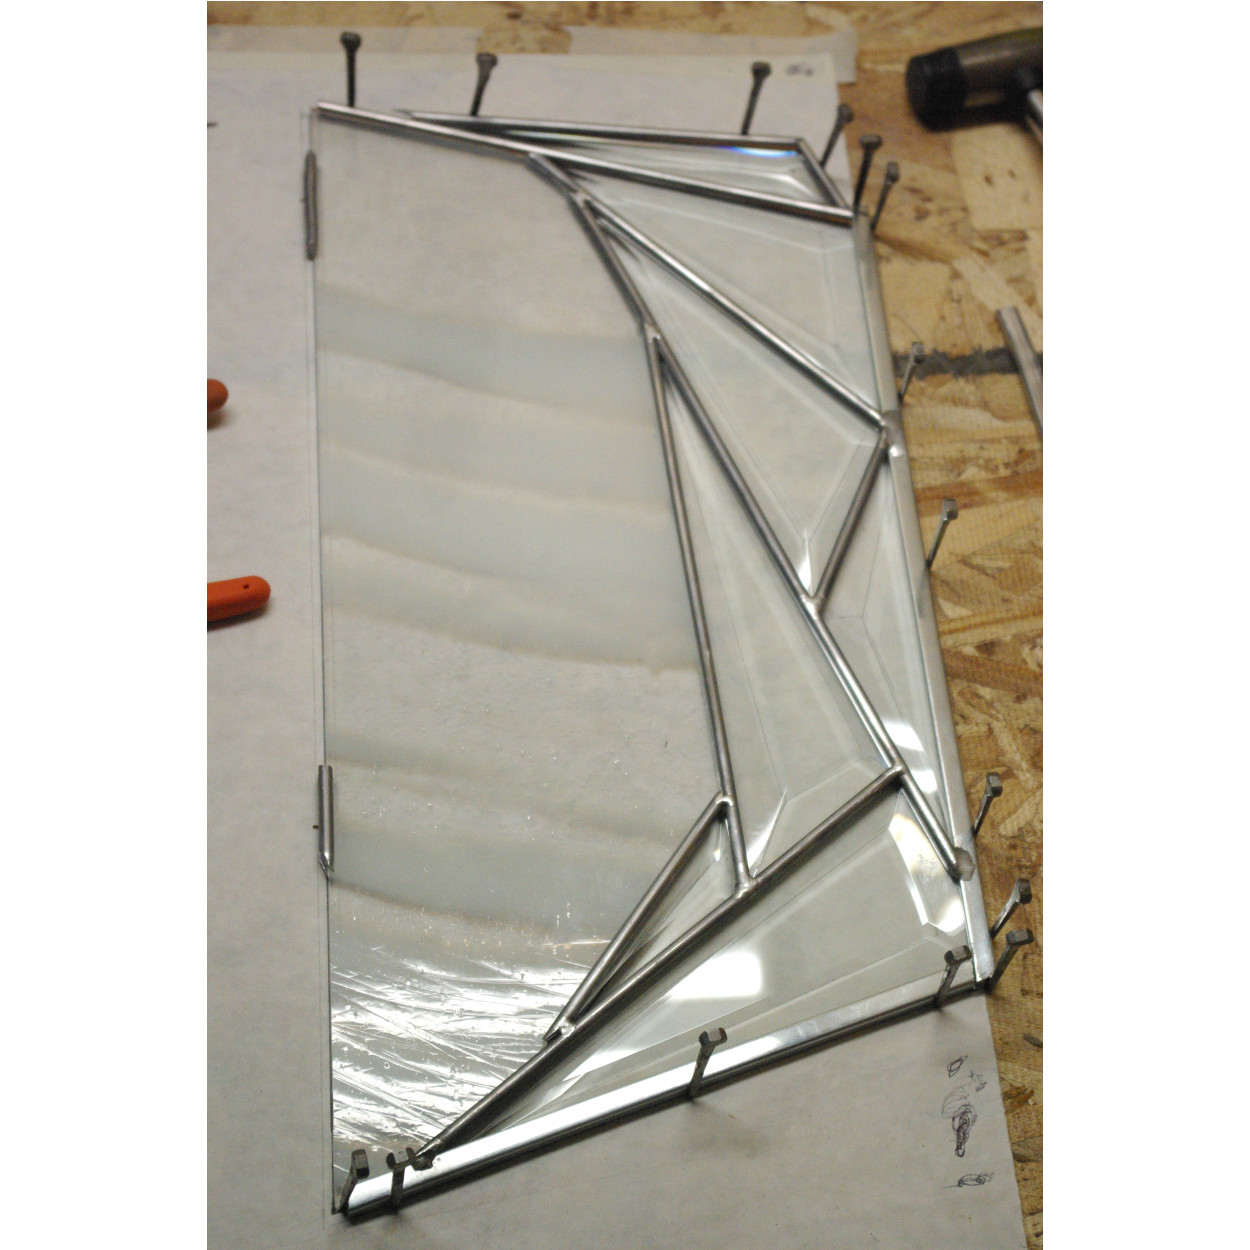
Before piecing together the panel I lay out the bevels and draw the actual shape to make sure everything will fit correctly and the shape is drawn correctly. Sometimes I have to grind some edges of the glass due to shards sticking out from the scoring/breaking process which will change the shape slightly.
The purpose of my art is to nourish your soul through the enrichment of your surroundings with the use of customized and intentioned light, color and movement. This is achieved by creating custom stained glass windows and oil paintings.
Friday, March 30, 2018
Bevels for Transom Window Completed
These are just a few of the bevels that I have been working on for the transom window. Now that these are completed I will begin fabricating the panel.
Before piecing together the panel I lay out the bevels and draw the actual shape to make sure everything will fit correctly and the shape is drawn correctly. Sometimes I have to grind some edges of the glass due to shards sticking out from the scoring/breaking process which will change the shape slightly.
Labels:
beveled glass,
bevels,
Custom,
design,
Entryway,
fabrication,
home décor,
interior design,
Stained glass,
transom,
transom window
Thursday, March 29, 2018
Beveling Inside Curves of Glass for Transom Window
Outside curves and straight edges are completed, now it is time to bevel the inside curves using upright beveling wheels.
Labels:
art in process,
beveling,
fabrication,
hand beveled glass,
Stained glass
Monday, March 26, 2018
Hand Beveling glass pieces for Transom Window
This is the first step, roughing stage, to get the angle and width of the bevel created. The next 3 steps are smoothing, pre polish and polish stages to get rid of the scratches in the glass.
Labels:
bevels,
hand beveled glass,
Stained glass,
transom
Friday, March 23, 2018
Beginning Fabrication of Transom Window
The transom window I had discussed earlier is now at the beginning stages of fabrication.
I am starting out with cutting glass that will be hand beveled. I start with these because sometimes the shape of them changes slightly and once completed I can draw the actual shape of them on the design before piecing the panel together. There are a few color pieces that I will be beveling a small section of to add more light play, movement and depth.
Thursday, March 22, 2018
Drawing inspired by a leaf
Here are a couple of quick drawings studying the line, flow and shadows of a leaf I shared about in the previous post.
Tuesday, March 20, 2018
Inspiration from leaves!
I was standing at the kitchen sink and looked down at a leaf and was really inspired by the form. The curves and shadows and the flow of it, I feel inspired to create a painting. Maybe draw some sketches first.
Monday, March 19, 2018
What to do with a Transom Window?
I received a call from a couple who have a transom window and really wanted to put something in that will improve the look of the space. It is nice in that it adds more light to the space and adding a stained glass window will really add a nice visual element to it.
The last picture shows how odd it is with the molding above the door rising above the lower sheetrock of the transom window. We discussed filling the whole area instead of just the window(glass) portion which will be more satisfying.
This is going to be a fun one to create! I will be showing the progress.
The last picture shows how odd it is with the molding above the door rising above the lower sheetrock of the transom window. We discussed filling the whole area instead of just the window(glass) portion which will be more satisfying.
I came up with a few designs after discussing with them what they like and wanted and they chose the middle one. The second picture shows the color scheme.
Thursday, March 15, 2018
Adding design and privacy to arched window!
I received a text from a homeowner in Spokane, WA who wanted to add privacy and a nice design to compliment the bathroom remodel he was doing. I had a design that he liked and I modified it to fit the shape of the window. I would update him by sending pics of the process and finally shipping it out to Spokane from Vancouver, WA. He was able to install it using glass clips I provided and following the steps I had sent in pictures.
The design ties in nicely with the trees in the background.
The result is amazing! I love how the textured glass blocks out his own roof and the neighbor's house and still provides light to the space. Here are the before and after results.
Thursday, March 8, 2018
Reinvigorating a Bathroom Window!
After the Artist Studio Tour last year, someone who attended the tour called and asked for me to take a look at a bathroom window in their home that needed reinvigorating. They had a dual pane slider and they had a shade that covered all the time because they needed privacy, but it blocked the light which they wanted. We discussed a glass panel to be mounted on the lower half instead of the whole window so they could still open it when needed. They wanted a flowing design tying into the trees in the background.
Here is what the window looked like.
Here are some pics after installation. I will be taking pictures again when there is better lighting.Wednesday, January 24, 2018
Broken Glass/Stained Glass? Part 3(final)
After removing the broken pieces, I insert the good pieces I had cut earlier. I soldered the joints and re puttied the sections that I replaced. I then insert the repaired section back into the panel, solder the joints and use a patina to darken the solder joints. The last thing is to clean the whole panel.
Monday, January 8, 2018
Broken Glass/Stained Glass? part 2
The following images show the process of removing the broken glass as well as separating the came to get to the broken pieces. The last image shows the process of cleaning out the came before being able to insert the new glass pieces.
Saturday, January 6, 2018
Broken Glass?
I have had several calls about broken stained glass and thought I would share one in process.
This is a tall panel in which 3 pieces of glass were broken. The second picture shows the broken pieces and the first shows how I have taken the section out of the main panel so it can be repaired. I still have to take apart additional sections to get to the broken pieces. The trick is to not break other pieces in the process. While the section is still together I went ahead and cut out good pieces. I did this since it is easier at this point while the shapes are still together.
Sunday, December 17, 2017
2 Abstract Designs; Geometric design in process
Geometric design in process. Piecing together the beveled triangles, adding a nice clear piece with white streaks, soldering the joints together as well as the external came.
Puttying to fill in the space in the came/glass.
I bonded on the beveled color pieces using Ultra Violet adhesive.
Puttying to fill in the space in the came/glass.
I bonded on the beveled color pieces using Ultra Violet adhesive.
Sunday, November 19, 2017
2 Abstract Designs, Geometric and Flowing
The first picture shows sketches of a couple of couple of designs on blue paper and the finished designs drawn out. I have started on the geometrical design on the right. The next several pics show the beveling in process and completed. The next to last pic shows pre polish on 2 sides and the polished step on the top side.
Thursday, November 16, 2017
Studio Tour!
Last weekend was the Clark County Open Studio Tour. I had fun showing my work and meeting lots of people. Some people who came last year also came this year, it was good to see them again.
I displayed both glass and paintings. Small glass panels are for sale as well as paintings which make for great gifts!
Sunday, October 22, 2017
Entry Way Stained Glass Installed!
This project turned out amazing!
The client is thrilled, stating: "It’s all we wanted and more. And everyone who has had their hands on this, from Stefan at the door store to the installer to the finisher has been thrilled to be a part of it. A lot of care in this piece. I can’t think of a better way to enter our home. Thank you!"
The following images are what the Entryway looked like before replacing with the above.
The client is thrilled, stating: "It’s all we wanted and more. And everyone who has had their hands on this, from Stefan at the door store to the installer to the finisher has been thrilled to be a part of it. A lot of care in this piece. I can’t think of a better way to enter our home. Thank you!"
Subscribe to:
Posts (Atom)