Thursday, December 2, 2010

Living Room window

This design was fun.  2 shades of blue hand beveled and bonded on top of commercial triangle bevels.  The red pieces are also hand beveled to give more light play. 

Monday, November 29, 2010

Leaded glass panel going into cabinet door.

This is a small panel going into a kitchen cabinet door.  The top image details the hand beveling on the triangles.

Thursday, November 18, 2010

Leaded glass window process, final step

Finished project installed in cabinet doors and details of the bevels.  One detail about the bevels is that they are not even all the way around.  I found this to add depth and dimension to the piece.

Monday, November 15, 2010

Leaded glass window process

These are kitchen cabinet doors that the leaded glass panels will go into. 

Friday, November 12, 2010

Leaded glass window process, step 10

In step 9 I showed the putty being applied.  I use a horseshoe nail along the edge of the lead to clean off the excess putty.  The above image shows a whiting on the glass to clean the glass, absorb oils from the putty and flux (soldering stage).  The whiting also helps the putty to dry faster.  The bottom panel has whiting on the backside and the top side is clean. 

Tuesday, November 9, 2010

Leaded glass window process, step 9

Puttying the panel- fills in any space between the glass and inside the lead channel. 

Monday, November 1, 2010

Wednesday, October 27, 2010

Leaded glass window process, step 6

This image show the zinc border on 2 sides, a beveled piece in place with a strip of lead cut and set into place on the right side of the beveled piece.  The gray glass is set in with the piece drawn out, ready to be cut.  Horshoe nail top left to hold frame in place.

Tuesday, October 26, 2010

Leaded glass window process, step 5 beveling

Bevels completed through the polish (final) stage. 

Friday, October 22, 2010

Leaded glass window process, step 4 beveling

Images show stages 3 (pre-polish) and 4 (polish) of beveling.  The wheel in the 2nd picture is the polishing wheel for straight edge and outside curves.

Tuesday, October 19, 2010

Leaded glass window process, step 3 beveling

These images show the first 2 stages of beveling- rough as seen on the straight edge and smooth on the inside curves.  2 more stages to go. 

Saturday, October 16, 2010

Aboriginal art at WSU

I visited WSU's art gallery yesterday and was pleasantly surprised at the exhibit- Contemporary Australian Aboriginal Art.  Lots of color and visual texture.  Fun to learn that they use symbols which have specific meaning throughout the design and texture.  An example is a horseshoe shape in the middle of a circle means woman or adult.  This symbol may be repeated to create a design within the whole piece.  It was fun to see this work.

Getting ready for hand beveling, step 2

The next stage is to cut the glass for hand beveled portions of the design.  I draw the bevels on the glass since I do not do an even bevel all around the shape (this is explained in a previous blog).

Wednesday, October 13, 2010

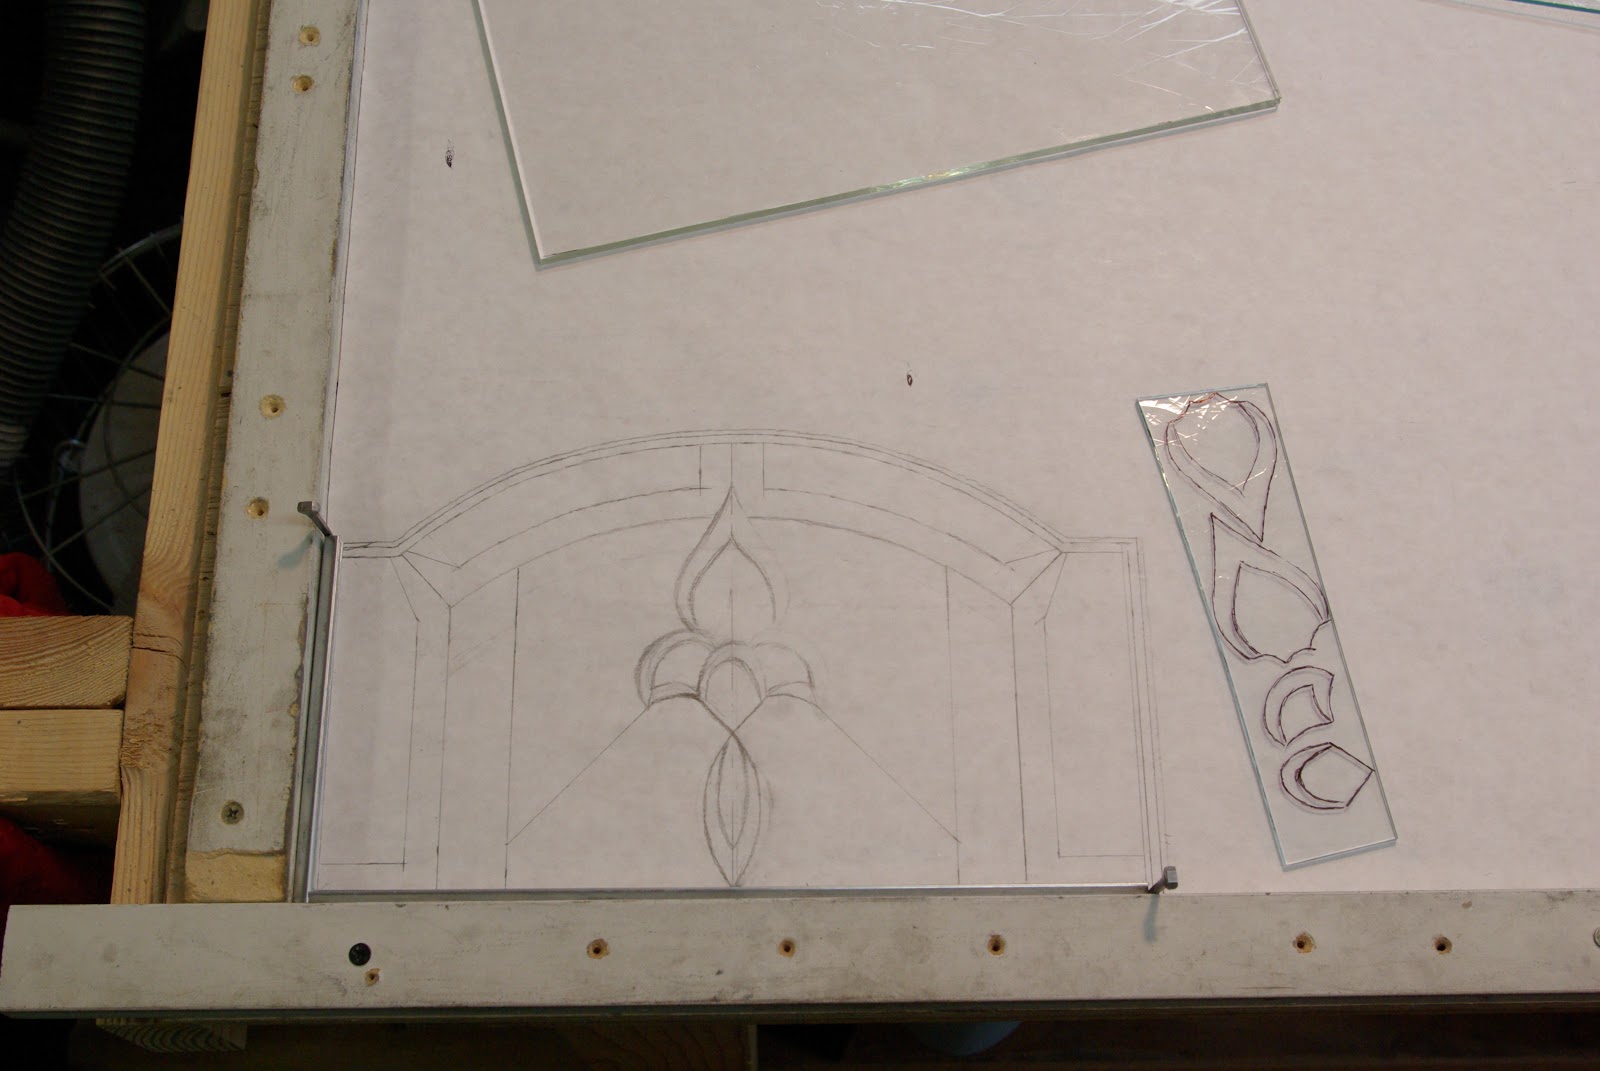
Leaded glass window process, step 1

The first step is to set up a right angle corner and lay out a sheet of paper to draw the design on.  I tend to also draw the bevels that I will be making.  The glass piece on the side shows 5 of the 9 shapes that will be hand beveled. 

Sunday, September 26, 2010

My father in law passed away

Today my father in law passed away which was unexpected and has caused a lot of grief in the family.  He was a wonderful man.  He accepted me into his family and I really enjoyed spending time with him.  We had a language barrier but we seemed to communicate well.  We picked on each other and had lots of laughs. He will be dearly missed. 
Otosan and I installing a stained glass window.

Thursday, September 23, 2010

Early stages of oil painting

This is showing a detail of Gusty II just drawn up on the canvas and early stages of painting.

Wednesday, September 22, 2010

2 Entry Ways

The following images are of stained glass in 2 entry ways in a house under construction.  The bottom right will be filled in with a stained glass panel. It is a good example of how the reeded glass distorts the field behind.  The idea for the design came from the surrounding alfalfa and grass fields, blades of grass being blown in the wind. Hand beveled and bonded glass throughout.
The sidelight in the next image is approx. 93" tall to help give some perspective to the size.  There is a blue tarp behind the glass.
The next image is a detail.

Friday, September 17, 2010

Monday, September 13, 2010

Hand drawn designs for stained glass

The following images show designs that I have drawn and presented to a client.  These are a little dark (I apologize).
I will show the client hand drawn images (the actual drawings are better than the pictures-I am not proficient at changing the image to look good on computer) and show glass samples to coincide with the image.  Sometimes I will color in areas to give example of where certain colors will go.

Wednesday, September 8, 2010

Details of Gusty II

I love these close ups.  They have a lot of texture and movement.

Tuesday, September 7, 2010

Painting or Drawing?

I had someone comment about this painting saying that he wished it were all painting and not looking like both painting and drawing.  Why can't a painting have both qualities?
I think that one thing that be said about my work is that it has bot painterly and drawing styles.

Wednesday, September 1, 2010

Images and similarities of the Palouse and my paintings

Moving to the Palouse area I notice similarities between the rolling hills, shadows and my painting.

Wednesday, August 25, 2010

Stained glass piece titled "Gusty"

I created this piece last November before I painted the oil painting titled "Gusty II".  This has hand beveled pieces with hand beveled blown glass bonded on top of the clear bevels.  There are clear beveled pieces throughout the piece.  I was trying to capture the wind pushing and pulling the tree with wind lines flowing with the branches/trunk.  If you look closely you can see a slight texture in the clear background glass.  A friend of mine is going to build a wood stand which this will set into and have chains securing the top of the piece.  When that is complete I will show a better picture of this piece.
I enjoy having part of the design/ wind, tree flow out of the frame.
Click on the picture to see the image better.

Tuesday, August 24, 2010

Settling in

We are settling in to our new home in Pullman, WA and have fixed some computer problems (hopefully) so I am back on.

Friday, July 23, 2010

Butchart Gardens

Last Sunday through Wed we along with Mina's parents went to Seattle and Victoria where we visited Butchart Gardens.  What a spectacular place!  The combination of colors and design & flow of the gardens was spectacular.  I will have to paint in these colors sometime.  You have to visit these gardens sometime. 

Thursday, July 22, 2010

Back to the basics- drawing

I am enjoying spending more time drawing ( when I can between packing, starting a new job, getting ready to move).  Drawing for me is the foundation to designing stained glass and to oil painting.  Studying, working things out, not worrying about what is going down on the page.  It is lots of fun and a good way to let go of the busy-ness of my mind.  When I get faster internet speed I will download images of pen&ink and pencil drawings.

Friday, July 16, 2010

Transition

We are going through a huge transition right now.  My wife got a job at WSU in Pullman which starts the second week in Aug and we are in the process of selling our house and buying one in Pullman.  We are planning on moving the first of Aug.  I just accepted a job offer down there last night and start work July 26.  Changes are scary and exciting.  I have had an image for a painting in my head of a bicyclist climbing a steep hill and calling it "Uphill battle" because of how I feel of trying to sell my art, needing to work at a real job to get out of debt, and all that life throws at us.  Hopefully, I will be able to paint that image soon, in the mean time learning this new job and getting to know new people will be fun. 

Monday, July 12, 2010

Human figure in glass

This design was originally an oil painting and I wanted to create it in glass.  I spent many hours hand beveling the figure and beveling colored glass and bonding it on top of the clear bevels.  Even the fingers are beveled. 
I wanted to capture the depth and dimension of the figure from the painting into glass so the bevels are varying width from one side to another and even on the same side.  This gave the feeling of a drawing. The colored glass is blown glass from Fremont.  This was a very challenging piece and I enjoyed it very much. 

Saturday, July 10, 2010

Human Figure

A lot of times my painting of the figure feels and looks like drawing which is a fun.  This is oil on canvas measuring 4ft x 4ft.

Wednesday, July 7, 2010

The human figure in painting/glass

The human figure is a fascinating subject, very complex and expressive.  I enjoy painting the figure to express something in particular or just to show the beauty of it.  Painting and drawing the figure always challenges me. 
I was expressing the emotion of anxiety using the figure with tensed muscles and fingers.  This is in oil and measures 4ft x 4ft.

Friday, June 25, 2010

Large windows

This window is 10ft by approx 40".  It was a challenge to create and ship but well worth it.  Hand bevels throughout, various textures.  This is in a wall which divides a bedroom and hallway.  The design ties into the railing from a staircase which curves up to this particular hallway.

Thursday, June 24, 2010

Stairwell window

The following is in a stairwell.  The vertical lines are the railing on the other side of the stairs.
The hand rail is mounted into walls on either side of the glass and has a groove in it which rests on top of the stained glass.  Hand beveled glass and various textured glass.  I enjoy the flow of this design within the triangle. 
Laminated glass is on the stairwell side for safety reasons.

Sunday, June 13, 2010

Bathroom Windows

This bathroom had an art deco design and I tied in some of the elements into the design.  I love the clear textures in this piece as the pick up different colors behind it.  It has a very different look in the fall and winter.

Wednesday, June 9, 2010

Bathroom Windows

Bathroom windows are a great space to have custom stained glass windows.  The following design was tying into some tile work in the bathroom which had this flowing leaf concept. 

Wednesday, June 2, 2010

River/ Water as inspiration, cont

The following is another glass piece inspired by water.  Sorry the pic is not the best.
Flowing from the sidelight into the door panels back to the sidelight makes this a fun design.